Last updated: March 26, 2024
Available with any of the following subscriptions, except where noted:
|
|
| Legacy Marketing Hub Basic |
Use HubSpot's full-screen social composer to create a post and publish it to multiple different social accounts at once. You can also create and publish social posts while on the go with HubSpot's mobile app.
After publishing, you can review your social posts or analyze the posts' performance in your social reports.
Please note: the social network will display the name of the user who connected the social account to HubSpot as the post creator. This is because HubSpot publishes the post to the social network using their credentials.
Create a social post
To create a new social post:
- In your HubSpot account, navigate to Marketing > Social.
- In the upper right, click Create social post.
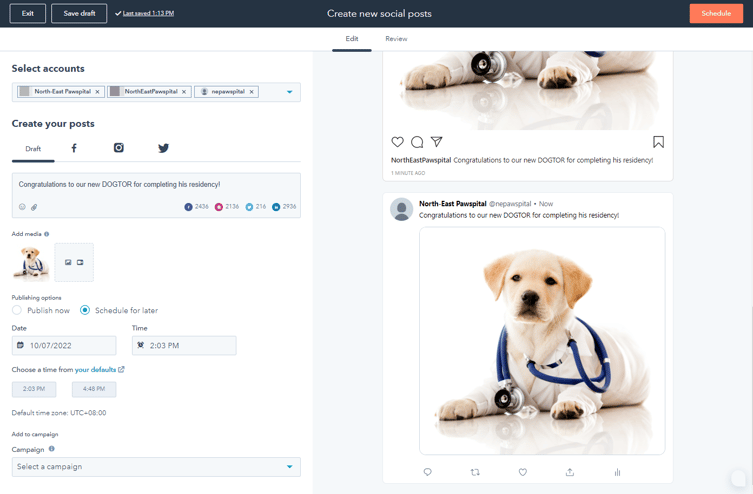
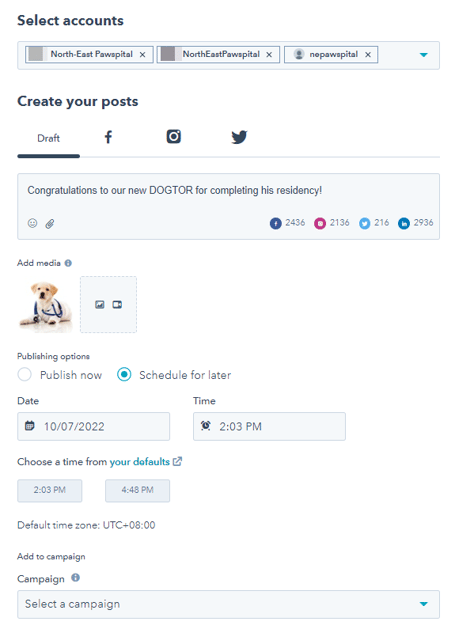
- In the left panel, click the Select accounts dropdown menu. Then, select the checkboxes next to the social accounts you want to post to.
- When posting to LinkedIn, you can also create LinkedIn document posts or polls.
- When posting to Instagram, you can publish multiple images or a video in a carousel post or reel. You can also add the First new comment on your Instagram post or reel.
Edit post content
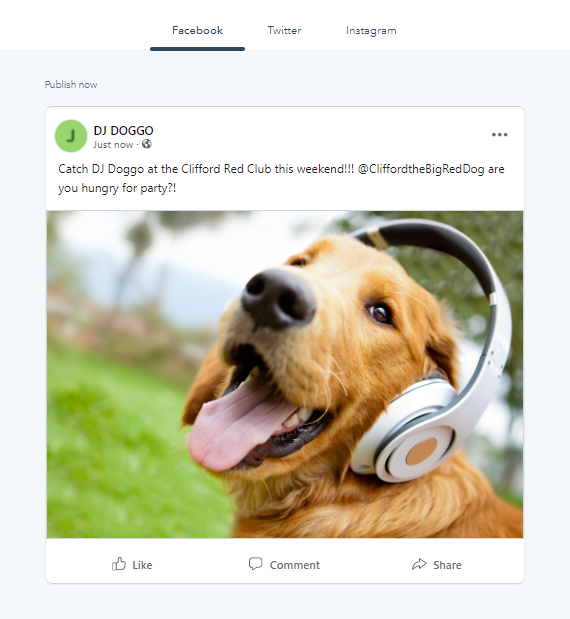
When creating your draft, the same content will be duplicated across all selected social network accounts. Previews for each network will be displayed in the right panel.
- Under the Create your posts section, in the text box, enter the content for your social posts.
-
- To add emojis to your post, click the emoji icon.
- To add hashtags to your posts, use the # symbol. Hashtags will not be hyperlinked in the drafted post or the preview, unless you're previewing a X post. The hashtag will be hyperlinked after you publish the post.
- To share content not hosted on HubSpot, enter the content link directly into the text box.
- It is not possible to customize the content link preview image for Facebook or X). However, you can remove the link preview image for Facebook.
- When adding links to your LinkedIn posts, you cannot replace the preview image in the Draft tab. Images replaced in the draft tab will not be hyperlinked.
- To replace your image, click the LinkedIn social icon then replace the image.
- It is not possible to remove the preview image for LinkedIn posts. If a content link is included in the post, a preview image for that link will be generated in LinkedIn by default.
- To mention other accounts, click a social icon to select a social network. Then, use the @ symbol to mention or tag other accounts in that network. When using @mentions in your social posts, do note the following:
- When setting up your post, @mentions will not display or auto-complete in the Draft tab of the editor. You will need to select a social network beforehand.
- It's recommended to add @mentions as the last step when setting up your social posts. After a post is edited for a specific social network, any edits made to the post will not apply to posts from other social networks. Similarly, any edits made on the Draft tab will not update the customized post.
-
- For the specific social networks, please also note the following:
-
-
- Facebook: Facebook's API only allows mentions or tags for Facebook pages. You cannot mention or tag individual Facebook users or Facebook events when creating a social post in HubSpot.
- Instagram: mentions will not be auto-completed, but Instagram will acknowledge the mention when the post is live.
-
-
-
- LinkedIn: you can mention both LinkedIn company pages and personal profiles when creating a social post in HubSpot. When mentioning personal profiles, both of the following requirements must be met:
- You can @mention both LinkedIn company pages and personal profiles in the content of your post. When doing so, third-party application data use must be authorized for HubSpot.
- When mentioning LinkedIn personal profiles, the LinkedIn user must meet the following requirements. If not, the user's profile will not appear and cannot be mentioned.
- LinkedIn: you can mention both LinkedIn company pages and personal profiles when creating a social post in HubSpot. When mentioning personal profiles, both of the following requirements must be met:
-
-
-
-
-
- The user must have public profile visibility turned on.
-
-
-
-
-
-
-
- The user must follow your LinkedIn page.
- The user must have a First name, Last name, and Headline.
-
-
-
-
-
-
-
- The user's default profile language must be set to English.
-
-
-
-
-
- X: only X accounts you follow will appear in the auto-complete dropdown menu. To mention accounts you don't follow, enter the full X handle. The mention will be acknowledged when the post is live.
- X: only X accounts you follow will appear in the auto-complete dropdown menu. To mention accounts you don't follow, enter the full X handle. The mention will be acknowledged when the post is live.
-
Please note:
- Instagram does not support links in posts.
- By default, the HubSpot social tool will shorten links in your social post to a hubs.ly, hubs.li, or hubs.la link. If you own a branded short domain on Bitly, you can connect your Bitly account to HubSpot to use your branded short domain for links in social posts.
- You cannot use custom tracking URLs in social posts published through HubSpot. HubSpot automatically adds tracking parameters to posts published through the social tool to track traffic back to the original post.
Add an image to your social post
When adding an image to your social post, you can use the following image formats:- png
- jpg
- jpeg
- gif (LinkedIn and X only, gifs will not play on Facebook or Instagram)
To add images to your social post:
- In the Add Media section, click the image icon. You can also drag and drop image files to the editor to add them to a post.
- To select an existing image from your file manager, click the image.
- To upload a new image from your device or a URL, in the bottom left of the panel, click Add image.
- Click into the search bar and enter a search term, then press the Enter key.
- Click the Stock images tab.
- Click an image to display the image details.
- Click Insert to add the image to your social post.
- After adding your image, in the left panel, hover over the image and click the pencil icon to open the image editor. You can crop, resize, or rotate the image, learn more about editing images in HubSpot.
Please note: alt text cannot be added to images on Instagram posts.
Add a video to your social post
When adding a video to your social post, it is recommended that each video is less than 1 minute in length. Adding a longer video may result in upload errors. You can use the following video formats:
- mp4
- mov
- mpeg4
- m4v
To add a video to your social post:
- In the Add Media section, click the video icon.
- To select an existing video from your file manager, in the right panel, click the video.
- To upload a new video from your device, in the bottom left of the panel, click Upload videos.
- To use a custom thumbnail with your video, update the thumbnail in your file's details. Custom thumbnails do not apply to Instagram posts or reels. To use a custom thumbnail in your Instagram feed, edit the cover image directly on Instagram instead.
- Alternatively, you can also drag and drop a video file directly to the editor to add it to a post.
Please note: While it is not possible to publish Instagram IGTV videos from HubSpot, analytics such as likes and impressions from externally published videos will still display. These analytics will also reflect in the social reports.
Manage your post publishing settings
You can choose to publish your social posts immediately or schedule the posts for a specific time in the future. You can also assign the to a marketing campaign.- In the Publishing options section, set up your publishing time:
- Publish now: publish the social post immediately.
- Schedule for later: select a specific date and time to publish the social post. You can also select a default time from your social publishing schedule.
- In the Add to campaign section, you can associate your post with a campaign:
-
- To associate your post with an existing campaign, click the Campaign dropdown menu and select a campaign.
- To associate your post with a new campaign, click the Campaign dropdown menu and click Create campaign. Then, continue setting up your campaign.
-
- If you've never created a campaign before, click Create a campaign. Then, continue setting up your campaign.
- If you're posting to Facebook, you can specify an audience for your post. Under the Create your posts section, click the Facebook social icon. In the Choose who can see your post section, select an audience:
- Public audience: the post will be displayed to everyone who can view your account or page.
- Custom audience: the post will be displayed only to the specified audience.
- Location: click the location dropdown menu and select a country. The post will display to visitors from these locations. You can select a maximum of 5 locations.
- Language: click the language dropdown menu and select a language. The post will display to visitors who use these languages. You can select a maximum of 5 languages. If you don't need a specified language, this option can also be left blank.
- If you're posting to LinkedIn, you can also specify an audience for your post. Under the Create your posts section, click the LinkedIn social icon. In the Choose who can see your post section, select an audience:
-
- Anyone: the post will appear for all LinkedIn users following, exploring, or reviewing your account or page.
- Target audience: the post will only appear for the specified audiences. You can target audiences based on language, job function, location, university, seniority, company size, and industry.
- To use this feature, you must have more than 300 followers. If not, the option to use targeted audiences will be locked.
- If you have multiple options in a single specifications type, each option will be combined with OR logic. For example, Entry and Senior employees for the Seniority field, both entry-level and senior-level employees will be included in your audience.
-
-
- If you have multiple specifications types, each specification type will be combined with each option with AND logic. For example, if you select English audiences for Language, and Entry and Senior employees for Seniority, only english entry-level employees and english senior-level employees will be included in your audience.
-
Edit the social post for specific accounts
By default, the same content is duplicated across all selected accounts in the editor. After a post has been edited for a specific social account, any edits made to the post will not apply to posts from other social accounts. Similarly, any edits applied to the Draft tab will not affect the customized post.
To edit the content for a specific social account:
- Under the Create your posts section, click the corresponding social icon.
- To delete the post, click the trash icon next to the social account name.
- To duplicate the post, click the plus icon next to the social account name.
- To edit the post, click the social account name. The post editor will be displayed for the selected social account.
Review your social post
After setting up your social posts, you can review the posts and post display across your selected social networks.
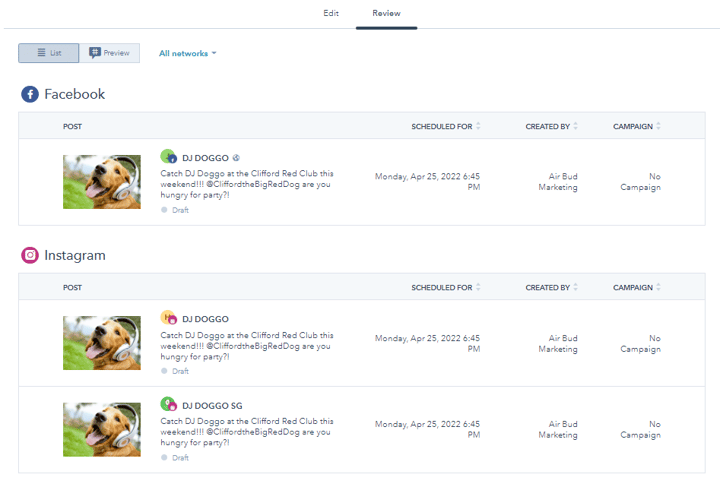
- At the top, click the Review tab.
- To view your created posts in list format:
- In the top left, click List. A list of the created posts with details will be displayed, sorted by social network.
- To filter your posts by social network, in the top left, click the All networks dropdown menu. Then, select a social network.
- To view your created posts in preview format:
- In the top left, click Preview.
- Click the social network that you want to preview your posts. Previews for the selected social network will be displayed.
- Once you've created your post, in the top right, click Schedule Post to schedule or publish your post.